Sunday, May 30, 2010

Lowering the costs of your IWB investment.

Luidia eBeam software
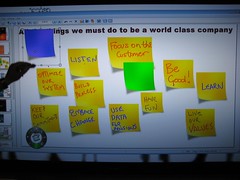
Image by AV-1 via Flickr

As part of my job, I not only present at workshops and conferences but produce white papers and material that outlines our products to educate our customers and persuade them to consider our services. It is not an easy job. I write more now than I ever did in school.

I'm lucky that I support product that I believe in and use on a daily basis, but it is still hard not to come across as a "used car salesman".

So for your edification and review I present my latest offering currently in draft. I've cut out the marketing bit at the end, case studies and the call to action, as I know large percentage of the people who read this are from outside Australia. I still think this is a good explanation about the current IWB market and the choices that can be made.

Any comments and suggestions are gratefully accepted and encouraged.

How to Put an Interactive Whiteboard Solution in Your Classrooms for Half the Cost.

You know that an interactive whiteboard in the right hands can engage, enthuse and inspire classrooms of kids. Research shows that using this type of technology in the classroom effectively reduces behaviour problems and increases interest and engagement of students.

But

They are expensive to buy and install, you have other things to spend your meagre budget on and you know that without the right support they could easily become an expensive white elephant in your school.

This education white paper examines how schools across Western Australia have halved the cost of their IWB investment and now have more engaged students and teachers who are confident daily users of the technology. Schools in the southern corridor from Safety Bay to Dawesville, both public and private, have reduced their costs while still providing their teachers with world class equipment and training.

The Three Elements of any Interactive White Board (IWB)


With any IWB installation there are three key pieces of equipment that make the magic happen, the good news is that you probably already have one.

1. The computer – Either a school desktop or a teacher laptop. Make sure if you are using a desktop that it has two VGA outputs, one to the projector and one to a screen.

2. The projector – Don’t skimp on this, get the best projector for the job as it will be what determines what the students see (or not see) and whether the system will get used or not. Do your research about ANSI Lumens, contrast ratios and the merits of regular, short throw and ultra short throw. Don’t forget about lamp lifetimes and replacement costs. Try and get the longest warranty you can.

3. The IWB system – This is what turns pen or finger movements into essential mouse movements and clicks. The interesting thing is that there are four different types of systems to choose from in Australia.

• Resistive — Resistive touchscreens are composed of two flexible membranes coated with a resistive material and separated by a thin gap. When contact is made to the surface of the screen, the two sheets are connected together, registering the precise location of the touch. This technology allows one to use a finger or a stylus on the board.


• Electromagnetic — These interactive whiteboards feature an array of wires embedded behind the board surface interacts with the stylus tip to determine the (X,Y) coordinate of the stylus. Styli are either active (requiring a battery) or passive (no batteries or other power source). In other words, the sensors in the board react and send a signal to the computer when there is contact with a magnetic pen.

• Capacitive — similar to the electromagnetic boards, the capacitive type works with an grid of wires embedded into the board. In this case the wires interact with fingers or a stylus touching the screen. The interaction between the different wires and the tip of the finger or stylus is measured and calculated to a coordinate.

• Ultrasonic and Infrared — When pressed to the whiteboard surface, the marker or stylus sends out both an ultrasonic sound and an infrared light. Two ultrasonic microphones receive the sound and measure the difference in the sound's arrival time, and triangulate the location of the marker or stylus. This technology allows whiteboards to be made of any material, but requires a suitably adapted active dry-erase marker or stylus. These systems can be retrofitted to existing whiteboards.

Installation
Installation is one of the ‘Hidden costs’ of interactive whiteboards, something that is only thought about after the decision has been made. Sometimes this can mean the price you were expecting and what ends up coming out of the budget can be two very different things.
There are two things to pay for when installing an IWB system.
- The electrician / installer, sometimes you will need two because of the physical size of the board (essentially doubles the cost)
- The cables and hardware required to make all the connections between all three elements.
- Don’t forget shipping. Sometimes delicate boards need specialised delivery arrangements.

Training
Just ask any principal from any school. If you don’t provide the right support when rolling out new technology that has the potential to change pedagogy then you might as well be burning your money. Staff training is crucial to making the most out of your investment, and again there are two types of training you should invest in.

- Technical training – this need to be done as soon as possible- even before the installation. This helps teachers feel confident that they can use the system to do basic tasks, and to experiment.

- Pedagogy training – Once you have the technical training done you can move on to the real reason you went out and bought the things. Changing the way teachers teach. Best done in workshops with moderated peer teaching with some key motivating ideas that can form part of some action research for your teachers to reflect on how they can use the technology to improve the outcomes for their students.

Once all this is done
You are finished; you have fund raised, procured, installed and trained. How much has that cost you per classroom? For most schools this figure hovers around the $10 000 mark; a big investment especially if you are in a big school and want to set up lots of rooms. Obviously some people are going to miss out. Some will be happy about that, as they only have a couple of years until they retire, but others will be very disappointed. How do you choose who gets this in their classroom and who does not?

Reducing the cost
So how do you bring the cost down to something more manageable? Let’s look at the three components.
Computer? – You already have that
Projector? – As discussed this is something you don’t want to skimp on. Make sure it is a 3LCD.
IWB system? – This is where you can make your savings, and your choices here you can also reduce your installation costs.

A regular fixed Interactive whiteboard (Resistive, Electromagnetic, or Capacitive) by its nature be contained within a specially made board. This means they are limited to the size that they are manufactured to and are expensive to produce, ship and install. Minimum price off the government contact for a small interactive board is $1720.

The Ultrasonic and Infrared system is different, and is the system used by Luidia’s eBeam product to uses the existing whiteboard as the surface and be accurate to 1.1mm on a board up to 3 meters across. The unit is about as big as an adult hand and attaches to the whiteboard surface through magnets, suction cups or permanently attached via bolts or screws. This means that the production, shipping and installation costs are drastically reduced. Permanently attaching the unit to a board with the required cables and end points usually costs $120, and the price of each unit is less than $900 ex GST. This device can give you a working area of up to 90" diagonally, more than most fixed boards.


A Note about installation
Some schools have further reduced or eliminated their costs for installation by using either expert parent or staff help. Capel Primary School has put in a large amount of eBeam installations through a couple of weekend busy bees coordinated and led by their principal. We can supply full instructions and specifications if you feel you have the expertise within your school community.

Training
As noted above training is the follow through that needs to happen if a successful roll out of new technology is going to happen. Unfortunately many of the fixed board salesmen are from an audio visual technology background – not an education background. So their technical training could be great, but the application of that training into an educational environment can be lacking.

Make sure that the vendor you get your solution from, has staff onboard who have experience at the chalkface. People who can successfully meld good teaching practise with good technology. This is where you will get the greatest effect from your investment in interactive whiteboard technology.

Training also needs to be available in a variety of formats to suit the needs of your staff. A quick one hour workshop or even half day is not going to be for everyone. Just like your students your staff have different needs and learning requirements, so will require different delivery.

Face to face – This is usually what you get as part of your purchase a 1 – 3 hour presentation where staff don’t get much time with the board and it is all just a bit of show and tell.

Off site workshops – The opportunity of sending your staff to neutral ground helps them to see the bigger picture and have extended time to discuss test and play with the technology and how they can use it. These are great time to network with other teachers and see how they are using the technology in their classrooms.

Online – Online recorded video delivery is not to be discounted. Here the learner has total control, they can stop and pause, jump to relevant points or get training at point of need at their our place and pace. One of You Tubes’ fastest growing genres is the tutorial, instructional videos that are accessed by thousands of people.

Guides and Manuals – believe it or not some people do actually read these. Make sure your vendor can make them available to all your staff.

Tuesday, May 25, 2010

The kids are escaping!!! You'd better run with them!!!

high school computer labImage by vanberto via Flickr

Recently there has been a big debate on echalk about the role of technology in schools and that very soon there will be a major paradigm shift in the way that our students access technology and information... and therefore how and what we teach. And the thing that frightens teachers and administrators is that there is not much they can do about it.

It was mentioned that schools should provide access to resources that are not normally available to kids at home. industrial kitchens, workshops with lathes and welding gear, theatres with lighting and sound systems - but when they come to our "computer" classes we give them something less powerful than the machine they have at home (including some consoles) and more locked down that at home. No wonder they are leaving computer science classes in high school and acting up in primary computer lessons.

The shift may look something like this...

3G and 4G wireless broadband will become cheaper, have more coverage and better bandwidth.
Internet enabled devices such as netbooks, iPads, PADD's and Phones will become cheaper than textbooks. And how are you going to know if they have a 3G or 4G card installed?


Therefore students will be able to access information unfettered by the school network from devices that are not owned by the school. That means all control is lost by the school and the administration - but does that mean they lose responsibility?

So what would be the point of providing school infrastructure such as computers or laptops as well as the network that runs them... apart from some specialised equipment for graphics video production or music.

What this does mean is that the Internet will be unfiltered for these students... Very scary for administrators - or an easy hand off - a perfect NMP (Not My Problem)?

So we are going to have to start teaching how to use the real Internet - not some sanitised version. It's similar to road safety - we are going to have to teach the students how to cross the road, ride a bike and eventually drive - something that has the possibility it may harm them or kill them.

School is real life, it is not a dress rehearsal or training for real life. When our students walk out the door of our classroom we cannot be the loco en parenti for everywhere they go. So we have to give them the skills to live in the jungle. One by one kids are escaping into the jungle... have you taught them the survival skills they are going to need?


Monday, May 17, 2010

Free 3D IWB

NASA World Wind, an open source virtual globe ...Image via Wikipedia

I recently (re)posted an article that ended up in a national educational guide. I got commented by "Knaus" to say that most of my ideas could easily be done without an IWB and just the projector.

I've looked at the post and Knaus is right... my intention with the article though was to break teachers out of the whiteboard software that comes with the board and to explore other ways that you can use all or parts of the technology that are in your classroom when you do get an IWB thrust upon you.

Knaus also expressed that an IWB is expensive - and as a good Keepad Interactive employee I have to point out that the eBeam from Luidia that we sell can sometimes be a better solution both cost and portability wise.

So here are some IWB 3D applications.

Google Sketchup - This works really well with an IWB, not only is it quick an easy to create three dimensional objects, you can use your IWB to interactively walk around your newly created 3D scene. Add the annotation function of most IWB software and you can take snapshots and annotate your virtual world. I use Sketchup all the time for my IWB demonstrations, and people are constantly amazed at how easy it is to use, and how effective it is. Design and technology teachers love it for making quick sketches, as do Maths teachers who see the value in 3D shapes.

Digital Library of Mathematical Functions - This is one for the high school maths teachers. This site host one of the most important mathematical guidebooks. Interspersed is 3D VRML and x3d files that show complex mathematical functions in 3D helping students to visualise Surface functions.


Edusim - Designed specifically for use with IWB systems, EduSim is a 3D environment where students walk through, exploring 3 objects and finding interfaces with images, and live webpages. But most importantly it is a multi user environment so you can have more than one student in the virtual world. They can communicate and collaborate in a worlds that can easily be controlled by the school. One of the great things is the ability to create something in Google Sketch up and then import it into EduSim.

Google Earth - Again you can take your models built in sketchup and post them into Google Earth. Google earth games are something you might like to try on your IWB


WorldWind - Similar to Google Earth, but with different layers and no streetview. This is more of a scientific program. By downloading the anyglyph plugin you can use those old fashioned 3D red/blue glasses to make your globe float out from the board. - Real 3D in your classroom. This is one of the program I use regularly to show off how to integrate an IWB into teaching without using the software that comes with the board.

Blender - Now we are getting into the heavy stuff. Blender is a fantastic Open Source 3D editing environment, used to make games, movies and 3D models from scratch. A steep learning curve, but I've taught kids how to use some of the basics in after school classes (demonstrating on an IWB) and they have gone on to make some amazing things in 3D.

DAZ - Bryce - If you want to create realistic and hyper realistic natural looking 3D environments, then this free download is what you need. Way ahead of it's time when released the is a great way to produce ray traced scenes easily. I bought (yes I sometimes buy software) Bryce2 back in 2001, left to go to the UK and other places. I downloaded it recently and got right back into the swing of it within half an hour. Really easy to use 3D software that works through the use of Boolean shapes and visual logic. This works great on an IWB, as you work with a range on onscreen tools rather than key presses like Blender.

DAVID - I've only come across this recently but I can see a great use for it in education already. David is free software that lets you create a 3D scanner out of 2 pieces of cardboard, a laser line level and an ordinary web cam. The results in the galleries are extraordinary, imagine being able to scan student's sculptures and projects straight into the computer - then manipulating them on your IWB.

Build AR ARive - Both of these programs help you to create 3D augmented reality items. Great for augmented popup books. I still haven't figured out how to do the video pop up but I will get there one day.

Rep-Rap / Cupcake CNC - Cheap to make and easy to build (apparently) these are homebrew 3D printers. I don't think it will be long before you will see 3D printers at your local Staples/Officeworks store. If you can't wait for one in your classroom though, they have all the blueprints and parts you need. Although not something to do on your IWB specifically it could be a great way to brainstorm and run a build project with your class if you are that way inclined. Could you imagine the conversation at home -

"So what did you do at school today?"
"Well we are starting to build a 3D printer that can print out any 3D object we have a file of or design."

If you have any more free 3D programs you you with your IWB, please leave me a comment I would love to hear from you.


Thursday, May 13, 2010

Computer Games


I've just come across this so I haven't tried them out yet.

Cisco have a whole slew of computer games both flash and downloads that actually teach people about the internet, networks, routers, and network security. Obviously there is Cisco branding but these games look like a lot of fun and mare more arcade style than a simple flashcard memory game.

Cisco games arcade

So if you are teaching higher level networking or you want a fun way to teach primary school students about the internet - Peter Packet is a good one. This would be a fun engaging way to get students into the subject without all the dry explanations and topology diagrams.


Reblog this post [with Zemanta]

Monday, May 3, 2010

Ten Disruptive Uses of Your IWB

<span class=
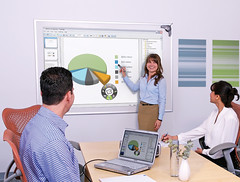
eBeam Projection Meeting" style="border: medium none ; display: block;">Image by eBeam via Flickr

I was asked to write an article last year for teachers who were just starting to use their IWB's and needed a bit of inspiration - The article has just been published in "The Ultimate Guide to Interactive Whiteboards 2010" which is distributed nationally to all schools. I'm just a little bit stoked by this as I thought it was only going to go in a trade magazine / catalogue.

Free subscriptions for the magazine are available here.
www.engagelearning.com.au

a PDF of the article is here

www.keepad.com/pdf/100223-HallJackson.pdf

One of the conditions that I agreed to the article was that I could then publish it on my blog when it got published and distributed.

So here it is minus all the nice graphics that were put in by their talented graphics team.

Ten things to do with your interactive whiteboard

Disruptive uses of the IWB

Many teachers get stuck on using their IWB as a direct replacement for their regular whiteboard or blackboard – a way of writing up notes, key words and diagrams. Sometimes they might bring in a piece of clip art as a magnet. Don’t get me wrong the use of an IWB is great as a digital replacement for the whiteboard and the overhead projector. My handwriting lessons are that much better because of an IWB (and I’m left handed)

Teachers need to be able to go beyond that analogy of an “interactive whiteboard” and see the technology for what it really is – an interface for your computer that allows direct interaction with programs, images and video – visual data. The following is some ways to extend your use of your new interface.

Use it as your TV via a USB tuner or internet TV

For less than $100 you can get a digital tuner for your laptop. Depending on where you are, the portable aerial is sometimes all you need to pull down current terrestrial digital TV (if not see if there in an aerial port in your classroom – you might be surprised) . The best thing is that these tuners usually come with software which lets you time shift - perfect for pausing a broadcast to comment or deal with an interruption.

This is a great tool for dealing with a current issue as you can compare and contrast different news outlets and their response to current events. There is also something to be said for a time table – a deadline to be ready for – in this case a particular broadcast.

Once you have worked with and analysed the media it would be a natural extension to make your own TV news or show. There are a number of ways that you can do this from the low tech basic webcam and a sheet, to the set up of a mini TV studio in you classroom.

“Newsmaker” software is great for organising and creating a news report in an easy to use way. With a simple autocue and basic effects your students can create a professional looking broadcast with a very small learning curve.

Of course there are an enormous number of video on demand sites out there. www.teacherstv.com.au , its UK counterpart www.teachers.tv, www.TED.com for inspirational speakers and of course youtube. Make use of these resources, especially when they are free.

Be a commentator

You have probably seen it most in sports broadcasts - the use of the pause and annotate effect. In Australia it is often used for cricket matches to visually highlight areas of interest or direction of travel. You can use the same feature with your interactive whiteboard.

Imagine a movie or a recording of a play put on by your students. By pausing and annotating you can highlight areas of interest to you students. More importantly students can participate, drawing in their ideas and designs to make the next live performance better.

Hook it up to a Wii, xBox or PS3

Seriously the computing power behind these game consoles is phenomenal and it is all about the “experience” – harness that power. Kids love to show what they know – be able to demonstrate this to their class and with you asking important – how and why questions lets them explore their problem solving skills. With a range of educational games, bringing in the game console is not as revolutionary as you think. For starters you might want to try Big Brain Academy Wii Degree

Simulate Real world objects

I remember (a long time ago) as a practice teacher trying to get my hands on a range of MAB blocks to teach a class about decimals. Getting my hands on enough equipment took most of my lunch break and when I didn’t have enough even for a demonstration then my whole lesson took a turn for the worse.

Virtual manipulatives are therefore a stress less way of demonstrating real world objects without worrying about quantities. An example of easy to use, readymade collection for mathematics is the Mult-e-Maths toolbox. With things like clocks, scales, and aforementioned MAB blocks, teachers have access to the tools they need to demonstrate and explain key concepts without having to worry about whether another teacher has the required resources.

The internet also has a wide range of virtual manipulatives. One of my favourites for science is the popular Phet website from the University of Colorado, that can also be downloaded entirely via a zip file found on their site. With open ended tasks you can demonstrate a range of concepts and ask “what if” questions with the ability to answer them.

Use it as a microscope

For around $200 you can get good quality USB digital microscopes that hook up to your computer, and can get to X200 magnification. Brilliant for showing the whole class what you are talking about in real time with real stuff.

Another way of making the really small really big is to download the free Virtual Lab from NASA. With prepared slides from both optical and electron scanning microscopes it give you the ability to show your class things that you usually can’t get your hands on such as moon dust and heat shield tiles from the space shuttle.

Go for a ride

Did you know Google Earth has a flight mode? You can virtually fly over the world via your computer. When you team that up with the 3D layer available via the interface, you can fly through cities and landscapes. Imagine being able to take your students the Swiss Alps or fly past the New York skyline.

There are also a range of web based mash ups that take information from Google maps, street view, and earth; and let you create a drive through from one place to another. Drive through the streets of San Francisco , or follow route 66. It may even give your class the motivation to put more local buildings into the database using Google Sketchup.

http://www.gaiagi.com/3d-driving-simulator/index.html

Drive Smart is free software for Victorian students developed by Monash University, designed to help new drivers with scanning and hazard perception. Use this software with your older students to make them more aware on the roads as pedestrians, cyclists and future drivers. Again you can use annotations to visually mark the image to explain key points.

Video Call

As a Star Trek fan, I am constantly amazed at how large amounts of the technology envisioned in that 60’s TV have come to pass. A video screen the size of Captain Kirk’s view screen is now in your classroom. So now you too can use video / audio communication across vast distances.

Skype and MSN have the ability to do video calls with free software and simple inexpensive webcams. Think about linking up your classroom with a counterpart in another state or country. Australia is in a great position as we share a time zone range with a diverse range of languages as you head north. Linking up an Australian Japanese class, with a Japanese English class would bring benefits that could only be achieved with an expensive field trip.

Student Response Systems

The IWB’s can have a detrimental effect in the classroom. You may find that the “sage on the stage” is back and your lessons start to get centred on you and the technology rather than the students and their learning.

SRS (Student Response Systems), used in the right way with an interactive whiteboard can have really positive effects in your classroom and make the classroom environment more participatory. Rockingham Senior High School have successfully done this in their science program, through the use of both eBeam portable IWB system and TurningPoint SRS

By integrating an SRS into your IWB use you can enable a continuous dialogue between you and your students. You can adapt your teaching and ensure understanding and cover learning styles. This combination makes for a truly interactive classroom, with the added ability to account for and monitor student interaction.

Use a document camera

Prices for document cameras have come down significantly. For around $600 you can get a good quality camera to bring documents and small realia and manipulatives to the big screen. It’s like having your old overhead projector back but updated to a digital form. The Epson DC06 even has a freeze button to hold the image while you move something else into place – useful for surprising your students.

They are not just for documents either, those pesky MAB blocks can be manipulated and used to great effect with every student being able to see. Take that idea further with science lessons as the camera can record and project your “on bench” experiment.


Let go!

As I said before, there is a great temptation to be the didactic teacher when you have this type of technology. While it is fun to play with the toys, you will be surprised when you give your students the opportunity to try their hand at working on the board – and not just to write one word or to circle the mistake in a maths problem. Give groups of students control of the board for extended lengths of time, use your IWB as a station in a learning journey. Even just to brainstorm what they have learnt at the end of the day.

Don’t be afraid of what is possible, experiment and play.
Reblog this post [with Zemanta]