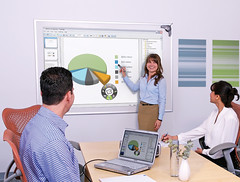
 eBeam Projection Meeting" style="border: medium none ; display: block;">Image by eBeam via Flickr
Free subscriptions for the magazine are available here.
www.engagelearning.com.au
a PDF of the article is here
www.keepad.com/pdf/100223-HallJackson.pdf
One of the conditions that I agreed to the article was that I could then publish it on my blog when it got published and distributed.
So here it is minus all the nice graphics that were put in by their talented graphics team.
Ten things to do with your interactive whiteboard
Disruptive uses of the IWB
Many teachers get stuck on using their IWB as a direct replacement for their regular whiteboard or blackboard – a way of writing up notes, key words and diagrams. Sometimes they might bring in a piece of clip art as a magnet. Don’t get me wrong the use of an IWB is great as a digital replacement for the whiteboard and the overhead projector. My handwriting lessons are that much better because of an IWB (and I’m left handed)
Teachers need to be able to go beyond that analogy of an “interactive whiteboard” and see the technology for what it really is – an interface for your computer that allows direct interaction with programs, images and video – visual data. The following is some ways to extend your use of your new interface.
Use it as your TV via a USB tuner or internet TV
For less than $100 you can get a digital tuner for your laptop. Depending on where you are, the portable aerial is sometimes all you need to pull down current terrestrial digital TV (if not see if there in an aerial port in your classroom – you might be surprised) . The best thing is that these tuners usually come with software which lets you time shift - perfect for pausing a broadcast to comment or deal with an interruption.
This is a great tool for dealing with a current issue as you can compare and contrast different news outlets and their response to current events. There is also something to be said for a time table – a deadline to be ready for – in this case a particular broadcast.
Once you have worked with and analysed the media it would be a natural extension to make your own TV news or show. There are a number of ways that you can do this from the low tech basic webcam and a sheet, to the set up of a mini TV studio in you classroom.
“Newsmaker” software is great for organising and creating a news report in an easy to use way. With a simple autocue and basic effects your students can create a professional looking broadcast with a very small learning curve.
Of course there are an enormous number of video on demand sites out there. www.teacherstv.com.au , its UK counterpart www.teachers.tv, www.TED.com for inspirational speakers and of course youtube. Make use of these resources, especially when they are free.
Be a commentator
You have probably seen it most in sports broadcasts - the use of the pause and annotate effect. In Australia it is often used for cricket matches to visually highlight areas of interest or direction of travel. You can use the same feature with your interactive whiteboard.
Imagine a movie or a recording of a play put on by your students. By pausing and annotating you can highlight areas of interest to you students. More importantly students can participate, drawing in their ideas and designs to make the next live performance better.
Hook it up to a Wii, xBox or PS3
Seriously the computing power behind these game consoles is phenomenal and it is all about the “experience” – harness that power. Kids love to show what they know – be able to demonstrate this to their class and with you asking important – how and why questions lets them explore their problem solving skills. With a range of educational games, bringing in the game console is not as revolutionary as you think. For starters you might want to try Big Brain Academy Wii Degree
Simulate Real world objects
I remember (a long time ago) as a practice teacher trying to get my hands on a range of MAB blocks to teach a class about decimals. Getting my hands on enough equipment took most of my lunch break and when I didn’t have enough even for a demonstration then my whole lesson took a turn for the worse.
Virtual manipulatives are therefore a stress less way of demonstrating real world objects without worrying about quantities. An example of easy to use, readymade collection for mathematics is the Mult-e-Maths toolbox. With things like clocks, scales, and aforementioned MAB blocks, teachers have access to the tools they need to demonstrate and explain key concepts without having to worry about whether another teacher has the required resources.
The internet also has a wide range of virtual manipulatives. One of my favourites for science is the popular Phet website from the University of Colorado, that can also be downloaded entirely via a zip file found on their site. With open ended tasks you can demonstrate a range of concepts and ask “what if” questions with the ability to answer them.
Use it as a microscope
For around $200 you can get good quality USB digital microscopes that hook up to your computer, and can get to X200 magnification. Brilliant for showing the whole class what you are talking about in real time with real stuff.
Another way of making the really small really big is to download the free Virtual Lab from NASA. With prepared slides from both optical and electron scanning microscopes it give you the ability to show your class things that you usually can’t get your hands on such as moon dust and heat shield tiles from the space shuttle.
Go for a ride
Did you know Google Earth has a flight mode? You can virtually fly over the world via your computer. When you team that up with the 3D layer available via the interface, you can fly through cities and landscapes. Imagine being able to take your students the Swiss Alps or fly past the New York skyline.
There are also a range of web based mash ups that take information from Google maps, street view, and earth; and let you create a drive through from one place to another. Drive through the streets of San Francisco , or follow route 66. It may even give your class the motivation to put more local buildings into the database using Google Sketchup.
http://www.gaiagi.com/3d-driving-simulator/index.html
Drive Smart is free software for Victorian students developed by Monash University, designed to help new drivers with scanning and hazard perception. Use this software with your older students to make them more aware on the roads as pedestrians, cyclists and future drivers. Again you can use annotations to visually mark the image to explain key points.
Video Call
As a Star Trek fan, I am constantly amazed at how large amounts of the technology envisioned in that 60’s TV have come to pass. A video screen the size of Captain Kirk’s view screen is now in your classroom. So now you too can use video / audio communication across vast distances.
Skype and MSN have the ability to do video calls with free software and simple inexpensive webcams. Think about linking up your classroom with a counterpart in another state or country. Australia is in a great position as we share a time zone range with a diverse range of languages as you head north. Linking up an Australian Japanese class, with a Japanese English class would bring benefits that could only be achieved with an expensive field trip.
Student Response Systems
The IWB’s can have a detrimental effect in the classroom. You may find that the “sage on the stage” is back and your lessons start to get centred on you and the technology rather than the students and their learning.
SRS (Student Response Systems), used in the right way with an interactive whiteboard can have really positive effects in your classroom and make the classroom environment more participatory. Rockingham Senior High School have successfully done this in their science program, through the use of both eBeam portable IWB system and TurningPoint SRS
By integrating an SRS into your IWB use you can enable a continuous dialogue between you and your students. You can adapt your teaching and ensure understanding and cover learning styles. This combination makes for a truly interactive classroom, with the added ability to account for and monitor student interaction.
Use a document camera
Prices for document cameras have come down significantly. For around $600 you can get a good quality camera to bring documents and small realia and manipulatives to the big screen. It’s like having your old overhead projector back but updated to a digital form. The Epson DC06 even has a freeze button to hold the image while you move something else into place – useful for surprising your students.
They are not just for documents either, those pesky MAB blocks can be manipulated and used to great effect with every student being able to see. Take that idea further with science lessons as the camera can record and project your “on bench” experiment.
Let go!
As I said before, there is a great temptation to be the didactic teacher when you have this type of technology. While it is fun to play with the toys, you will be surprised when you give your students the opportunity to try their hand at working on the board – and not just to write one word or to circle the mistake in a maths problem. Give groups of students control of the board for extended lengths of time, use your IWB as a station in a learning journey. Even just to brainstorm what they have learnt at the end of the day.
Don’t be afraid of what is possible, experiment and play.![Reblog this post [with Zemanta]](http://img.zemanta.com/reblog_e.png?x-id=f3e351d8-9e7b-44fb-94d9-3b707d061206)
11 comments:
... and of course Edusim ! at http://edusim3d.com
good point - ran out of space though for the article.
Great post with amazing student activities.
However, my issue with IWBs and the agrument for them is that there is generally a lack of separation between IWB, projector and software. The projector is much less expensive than the board and the software is, generally, a free download.
Reasons #1, 3, 5, 6, 7, 8, & 9 (I only counted 9) all deal more with what a projector can do than what an IWB can do. Reason #2 does use the IWB and that is great use of the tool.
In addition, you propose spending more money, adding a document camera, student response system and microscope. All of these are great investments but don't necessarily need an IWB.
Please don't think that I am trying to trash your ideas. Every idea that you proposed is great teaching. I'm trying to get you to think about the actual tool.
IWB, doc. cam., microscope, SRS and projector. That's a lot of money. The biggest cost, roughly $3000 is the IWB.
What else could you do with $3000? Personally, in setting up a classroom, I'd sacrifice the IWB for 6 laptops, 15 iPod Touches or something else that I can get into the hands of students.
Of course, if someone wanted to put an IWB in my room along with all the other tools, I wouldn't send them away.
Great points - you are right. Most of these would work well with just a projector and computer.
I work with a lot of teachers who get their interactive whiteboard and seem "locked in" to the concept. The idea with this article was to break out those teachers who were still using the software that comes with the board, to be more creative with what they have.
So many of the teachers I visit have no idea thay can access the internet or other programs, or that they have the opportunity to use other resources such as DVD's with the projectors.
Your right the average cost of an IWB sans projector is around $3000. Keepad Interactive (my employer) sell the ebeam which turns any ordinary whiteboad into an IWB from about $890 AU - a much better proposition. I've had mine now for almost 3 years and take it everywhere, even today I used it on a plaster drywall at our local Independant Living Centre.
Your response has spured me on to write another article with a tight IWB focus.
Great ideas! I would like to include an extra point or two -- specifically ones that don't require extra equipment.
10. Student collaboration -- The key to 'successful' iwb use in the classroom is to set up the class with 'centers'. That way, small groups of 3 - 5 students can work on collaborating to solve a problem on the board while the rest of the class is engaged in either 'pre' or 'post' collaboration activities (journaling, prep reading, recording of hypothesis/analysis, etc.)
11. Student exploration/inquiry -- again, the key is to put the SMART board (or other iwb) into the hands of students in small groups at a time. Letting students take control and explore an interactive website that sparks inquiry and discussion is very effective on a large screen.
Thanks for sharing your ideas! I'm glad someone pointed out that while showing videos is not the be-all-end-all of iwb use, it definitely provides a nice replacement for the crappy 20-inch tube tvs that most classrooms had a few years ago :)
@Vanessa - The center concept works so well with IWBs. Great suggestions
@Hall - I agree that teachers who get boards tend to see them as one-dimensional and breaking them out of that mode is key.
I think that IWBs are a transition piece for teachers. It gives them a step to technology. It replaces chalk. However, they can do so much more. If they are used the right way, they are worth the expense. In my experience, not many teachers take full advantage.
The eBeam is a less expensive option. However, what about a wireless slate? I tend to use that more often in my classroom than the IWB because I can sit with kids or walk around the room. And it is much less expensive.
Here's what I'd love: A tablet (iPad?) that wirelessly connects to a projector. With my finger or a stylus I can control the internet, IWB software, SRS, whatever. If it had a camera, I could use it as a document camera.
Okay, I've said to much. If your employer makes something like this, I want a cut. You heard it here first!!! (I hope my humor came through on that!)
@Vanessa: We are working with a local primary school to change their 100year old classrooms from front facing to multifacing/multi station layouts. Their original white/blackboards are built into the room - on a slope, with cupboards underneath- making it almost impossible for their students to get at their boards. We are insalling lower whiteboards on the side of the room so students can have access.
Like I said in the article, giving students extended time at the board in groups is much more productive than a couple of seconds.
@Knaus - HP will be coming out with what you are after - they are still trying to figure out what OS to use now that they bought Palm Tech. look up the HP pad on you tube for one of their CES videos. You would probably want to run two computers - the pad and a low cost/obsolete computer running VNC to push the video to the projector.
Luidia make a nice Slate called Inscribe - it has a great feature that lets you have two cursors (one for the eBeam and one for the slate) so two people can collaborate in real time.
Wacom also make a great wireless slate (graphire Bluetooth), but doesn't have the multi cursor capability.
Different teachers, different classrooms, different students, different schools - it all means that we need different solutions.
Congratulations! Very exciting that your work is reaching so many. Valuable ideas for teachers who get stuck in one mode of using their IWB's. I'm passing it on to our teachers (who all have an IWB).
@Hall- Thanks for the info. I'm looking into the HP deal. Might be perfect.
I'm definitely spoiled right now in my classroom. I've got all the toys you wrote about: Promethean board, projector, doc. cam., SRS, laptops.
One tool that I've been playing around with lately is a Promethean wireless slate. It's basically a a version of a Wacomm tablet. I'm enjoying it but it is hard to watch the board and try to "mouse" with the pen on the board.
Something with a screen that is wireless is perfect.
This is a great discussion. I'm glad that it has kept going.
So much traffic for this article - All through someone tweeting and others retweeting - and then blogging. Thank you.
@Knaus - Slates are hard for adults to get used to (a bit of cognitive/physical dissonance, like when you first used a mouse). When I have given a slate to a student they have been able to pick it up in about 2-3 mins.
@Mrs Tenkely - thank you for your comments and support over the last couple of months.
I agree with many of the comments. While your suggestions are all great ideas, almost all of them can be done without the IWB. I also agree with your statement that the IWB might ten to make teachers move more to the sage on the stage mode, which is where we are trying to get them away from unless it is a skill that must be directly taught. I personally would rather have netbooks in the hands of kids than see all this money put into a teaching station.
Post a Comment